Understanding the Issue
Introduction
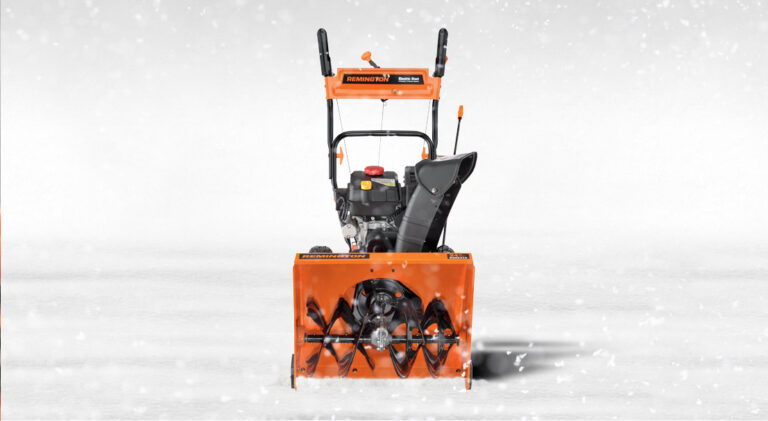
Craftsman snowblowers are reliable tools for tackling winter’s fury, but encountering issues with the electric start can be frustrating. If your Craftsman snowblower electric start won’t turn over, don’t worry – we’ll guide you through troubleshooting steps to get it back in working order.
Common Causes
Several factors could contribute to the electric start malfunctioning. Let’s explore some of the common culprits:
Battery Health The electric start relies on a functioning battery. Check if the battery is charged and in good condition. Cold temperatures can affect battery performance, so it’s crucial to ensure it has ample power.
| Symptom | Possible Cause | Solution |
|---|---|---|
| Electric start is sluggish | Weak or dead battery | Charge or replace the battery as needed |
| No response when starting | Disconnected or corroded terminals | Clean and reconnect terminals; replace if necessary |
Ignition Switch The ignition switch plays a key role in starting the snowblower. If it’s faulty, the electric start may not engage. Ensure the ignition switch is in the “on” position.
| Symptom | Possible Cause | Solution |
|---|---|---|
| No power to the electric start button | Faulty ignition switch | Replace the ignition switch if it’s malfunctioning |
Starter Motor Issues The starter motor is responsible for turning the engine over. If it fails, the electric start won’t function correctly.
| Symptom | Possible Cause | Solution |
|---|---|---|
| Unusual noise when starting | Damaged starter motor gear | Replace the starter motor if gear damage is identified |
| Starter motor not engaging | Faulty starter solenoid | Test and replace the solenoid if necessary |
Expert Advice
While addressing these common causes, consider the following expert tips:
- Battery Maintenance: Regularly check and maintain your battery, especially before the winter season. Cleaning terminals and ensuring a full charge can prevent many startup issues.
- Ignition System Inspection: Periodically inspect the ignition system for any signs of wear or damage. Timely replacement of faulty components can prevent larger problems.
- Starter Motor Lubrication: Lubricate the starter motor periodically according to the manufacturer’s recommendations. This simple maintenance task can extend the life of the motor.
In the next section, we’ll delve deeper into specific troubleshooting steps for each of the identified causes.
Troubleshooting Steps
Testing the Battery for Craftsman Snowblower Electric Start Issues
Symptom: Electric Start is Sluggish
If you’re experiencing sluggish performance or a complete lack of response from the electric start on your Craftsman snowblower, a critical first step is to thoroughly test the battery. A weak or failing battery is a common culprit in such scenarios.
1. Battery Inspection:
Visual Check:
Begin by visually inspecting the battery. Look for any signs of damage, corrosion, leaks, or swelling. These issues can indicate a compromised battery that may need replacement.
Voltage Test:
Perform a voltage test using a multimeter. Here’s a step-by-step guide:
- Multimeter Setup:
- Set your multimeter to the DC voltage setting. Ensure it is within an appropriate range for automotive batteries.
- If your multimeter has selectable voltage ranges, choose one that can measure at least 12 volts.
- Connect the Probes:
- Connect the multimeter’s red probe to the battery’s positive terminal (+).
- Connect the black probe to the negative terminal (-).
- Reading the Voltage:
- With the probes connected, read the voltage displayed on the multimeter.
- A fully charged battery should read around 12.6 volts. If the voltage is significantly lower, it indicates a discharged or weak battery.
2. Charging the Battery:
Use a Battery Charger:
If the battery voltage is below the recommended level, use a compatible battery charger to recharge it. Follow these steps:
- Disconnect the Battery:
- Disconnect the battery from the snowblower to ensure safety during the charging process.
- Connect the Charger:
- Connect the positive (red) lead of the charger to the positive terminal of the battery.
- Connect the negative (black) lead to the negative terminal.
- Set Charging Parameters:
- Refer to your battery charger’s manual to select the appropriate charging parameters. Follow the recommended charging time.
- Monitor Charging:
- Keep an eye on the charging process. Once complete, disconnect the charger.
3. Battery Replacement:
If the battery fails to hold a charge or if the voltage remains low even after charging, it may be time for a replacement. Choose a compatible battery for your Craftsman snowblower, ensuring it meets the manufacturer’s specifications.
Regularly checking and maintaining the battery is essential, especially before the winter season. By following these steps, you can identify and address battery issues that may be hindering the performance of your snowblower’s electric start. Remember to prioritize safety during all maintenance tasks and consult your user manual for model-specific guidance.
Verifying the Ignition Switch for Craftsman Snowblower Electric Start Issues
Symptom: No Power to the Electric Start Button
If you’re encountering a situation where there’s no power reaching the electric start button on your Craftsman snowblower, the ignition switch may be the culprit. Ensuring the ignition switch is functioning correctly is crucial for the electric start system to engage.
1. Ignition Switch Position:
Check the Switch Position:
Start by verifying that the ignition switch is in the correct position. The “On” position allows electrical power to flow through the system, enabling the electric start. Follow these steps:
- Locate the Ignition Switch:
- Identify the ignition switch on your Craftsman snowblower. It’s typically located on the control panel.
- Turn the Ignition Switch:
- Ensure the ignition switch is turned to the “On” position. If the switch is in the “Off” position or in an intermediate state, the electric start may not receive power.
- Inspect for Damage:
- While checking the switch position, visually inspect it for any signs of damage or wear. Damaged switches may not make proper electrical contact.
2. Ignition Switch Replacement:
If the Ignition Switch is Faulty:
If the ignition switch is damaged or fails to provide power to the electric start button even in the “On” position, replacement may be necessary. Follow these general steps:
Safety First:
- Before replacing the ignition switch, disconnect the spark plug wire to ensure safety during the procedure.
Remove the Old Switch:
- Depending on your snowblower model, you may need to remove the control panel or access the ignition switch directly. Follow the manufacturer’s instructions for disassembly.
Disconnect Wires:
- Carefully disconnect the wires from the old ignition switch. Take note of their positions or use a camera to document the wiring for reference during installation.
Install the New Switch:
- Install the new ignition switch in the reverse order of removal. Ensure the wiring is correctly connected.
Test the Electric Start:
- Reconnect the spark plug wire and test the electric start to ensure the new ignition switch is functioning correctly.
Expert Tip: Periodic Inspection and Maintenance
To prevent ignition switch issues, conduct periodic inspections. Check for any signs of wear, corrosion, or damage. Lubricate moving parts as recommended by the manufacturer. Addressing potential problems early can extend the life of the ignition switch and contribute to the overall reliability of your snowblower.
Remember to consult your user manual for model-specific guidance on ignition switch replacement and maintenance. If you’re unsure or uncomfortable with the replacement process, consider seeking professional assistance to ensure a safe and accurate procedure.
Inspecting the Starter Motor for Craftsman Snowblower Electric Start Issues
Symptoms: Unusual Noise or Starter Motor Not Engaging
When you encounter unusual noises during startup or the starter motor fails to engage, it’s time to inspect the starter motor and its components. A properly functioning starter motor is essential for the electric start system to work efficiently.
1. Inspect Starter Motor:
Visual Inspection:
Start by visually inspecting the starter motor. Depending on your snowblower model, the motor is typically located near the engine. Follow these steps:
- Locate the Starter Motor:
- Identify the starter motor on your Craftsman snowblower. It’s often housed under a cover for protection.
- Visual Check:
- Look for any visible signs of damage, corrosion, or loose connections. Damaged components may affect the starter motor’s performance.
2. Starter Solenoid Test:
Testing the Solenoid:
The solenoid plays a crucial role in engaging the starter motor. If the solenoid is faulty, it can result in the starter motor not engaging. Follow these steps to test the solenoid:
- Locate the Solenoid:
- Identify the starter solenoid, usually mounted near the starter motor.
- Multimeter Test:
- Set your multimeter to the continuity or ohms setting.
- Touch the multimeter probes to the solenoid terminals.
- If there’s no continuity, it indicates a faulty solenoid that may need replacement.
3. Lubrication:
Maintaining Starter Motor Components:
Lubrication is essential for the smooth operation of the starter motor and its components. Follow these guidelines:
- Refer to the Manual:
- Consult your Craftsman snowblower’s manual for recommendations on the type of lubricant to use and the lubrication points on the starter motor.
- Lubricate Gears:
- Apply the recommended lubricant to the gears and moving parts of the starter motor. This helps prevent wear and ensures smooth engagement.
4. Gear Inspection:
Checking the Starter Motor Gear:
A damaged starter motor gear can cause unusual noises during startup. Follow these steps to inspect the gear:
- Remove the Starter Motor Cover:
- Depending on your snowblower model, you may need to remove the cover to access the starter motor.
- Visual Inspection:
- Examine the starter motor gear for any signs of wear, chipping, or damage. If the gear is compromised, it may need replacement.
5. Starter Motor Replacement:
If Issues Persist:
If the visual inspection, solenoid test, and lubrication do not resolve the starter motor issues, it may be necessary to replace the starter motor. Follow these general steps:
- Safety Precautions:
- Disconnect the spark plug wire to ensure safety during the replacement process.
- Remove the Old Motor:
- Depending on your snowblower model, you may need to disassemble parts to access and remove the starter motor.
- Disconnect Wires:
- Carefully disconnect the wires from the old starter motor. Document the wiring or take pictures for reference during installation.
- Install the New Motor:
- Install the new starter motor, ensuring all connections are secure and aligned correctly.
- Test the Electric Start:
- Reconnect the spark plug wire and test the electric start to ensure the new starter motor engages smoothly.
Expert Tip: Regular Maintenance
To ensure the longevity of your starter motor, incorporate regular maintenance into your snowblower care routine. Follow the manufacturer’s guidelines for lubrication intervals and inspect the motor for any signs of wear. Addressing potential issues early can prevent more significant problems down the line.
Always refer to your user manual for model-specific guidance on starter motor maintenance and replacement. If you’re uncertain about the replacement process, seek professional assistance to ensure a safe and accurate procedure.
Conclusion
In troubleshooting your Craftsman snowblower’s electric start, identifying and addressing the specific issue is crucial. Regular maintenance and timely attention to potential problems can ensure a reliable performance, even in the harshest winter conditions.
Remember, if these troubleshooting steps don’t resolve the issue, it’s advisable to consult the Craftsman’s user manual or seek professional assistance to avoid causing further damage. Taking a systematic approach to problem-solving increases the chances of a quick and successful resolution.